Main Courses
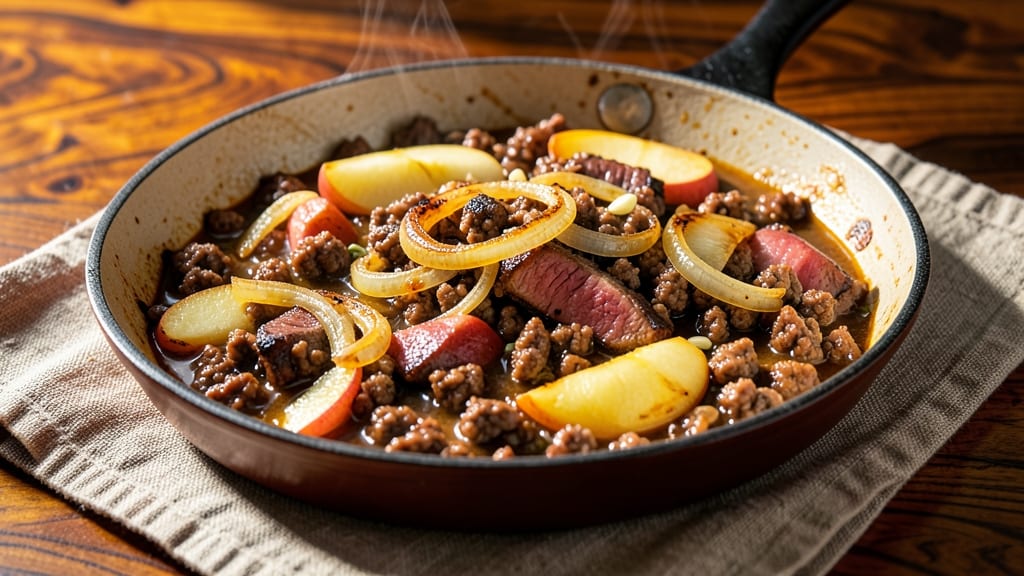
This ground beef and apple recipe transforms a simple weeknight meal into a savory-sweet masterpiece with caramelized edges that steal every bite. 🍏 The secret lies in balancing the natural sweetness of apples with rich, seasoned ground beef—creating a dish that feels both comforting and unexpectedly sophisticated.
I perfected this technique after years of experimenting with sweet-savory combinations, and it’s now a regular on my family’s dinner rotation.
The beauty of this recipe is its versatility. You can serve it as a hearty skillet dinner, stuff it into halved apples for an elegant appetizer, or even stretch it into a filling stew.
The apples soften just enough to release their juices, while the beef develops a deep, caramelized crust that adds texture and depth. It’s the kind of dish that turns basic ingredients into something restaurant-worthy.
What makes this recipe stand out is how effortlessly it comes together—no fancy techniques required. Brown the beef first to build flavor, then add the apples and let them caramelize slowly. The result is a dish that’s rich, slightly sweet, and packed with savory notes.
Each bite delivers a perfect harmony of textures and flavors, making it ideal for both weeknight dinners and special occasions.
Pair it with crusty bread to soak up the juices, or serve it over mashed potatoes for a cozy, hearty meal. The possibilities are endless, and the best part? It’s ready in under 45 minutes, with minimal cleanup. Let’s get cooking!
Ingredients for ground beef and apple
The perfect balance of savory beef and sweet apples—simple ingredients that deliver restaurant-quality flavor.
| Ingredient | Amount | Notes |
|---|---|---|
| Ground Beef (85% lean) 🥩 | 1 ¼ lb | Freshly ground for best texture |
| Apples (Honeycrisp or Fuji) 🍏 | 2 medium | Peeled and sliced into wedges |
| Yellow Onion 🧅 | 1 whole | Diced into small pieces |
| Garlic Cloves 🧄 | 3 cloves | Minced for even distribution |
| All-Purpose Flour 🌾 | 2 tbsp | For thickening the sauce |
| Beef Broth 💧 | 1 cup | Low-sodium preferred |
| Brown Sugar 🍬 | 2 tbsp | Enhances caramelization |
| Apple Cider Vinegar 🍎 | 1 tbsp | Balances sweetness |
| Dried Thyme 🌿 | 1 tsp | Or 1 tbsp fresh thyme |
| Salt 🧂 | 1 tsp | Kosher or sea salt |
| Ground Black Pepper 🌶️ | ½ tsp | Freshly ground preferred |
| Olive Oil 🫒 | 1 tbsp | For searing beef |
| Fresh Parsley 🌿 | ¼ cup | Chopped for garnish |
The ground beef is the foundation, so look for 85% lean at your grocery store—it gives that rich, caramelized crust without too much fat. Costco or Walmart usually have it pre-ground, but if you're buying a whole chuck roast, ask the butcher to grind it fresh. The apples are non-negotiable—Honeycrisp or Fuji hold up best to cooking and stay crisp. I always buy a few extra in case someone wants seconds. For the onion, yellow is best here—it's sweeter than red and caramelizes beautifully.
No brown sugar? Maple syrup at half the amount works in a pinch, though it'll be slightly less caramelized. Fresh thyme is ideal, but dried at one-third the quantity is fine if that's what you've got. The beef broth can be subbed with water, but low-sodium is key—otherwise, you'll need to adjust the added salt. For the apples, if you can't find Honeycrisp or Fuji, Gala or Braeburn are solid second choices. Just avoid Granny Smith—they're too tart for this dish.
This dish reheats beautifully—just add a splash of water or broth to keep it moist. Store leftovers in an airtight container for up to 4 days in the fridge. For longer storage, portion into freezer-safe containers and freeze for up to 3 months. The flavors actually deepen after the first night, so leftovers are often the best part. Garnish with fresh parsley right before serving to keep everything bright and fresh.
Why You'll Love This Recipe
- One-Pan Magic: I swear by this recipe because it’s the kind of meal where you brown the beef, toss in the diced apples and onions, and let it all caramelize together—no extra pots, no extra stress. The flour thickens everything just enough to make it feel hearty without requiring a roux.
- Sweet-Savory Balance: The apples add this bright, almost candy-like sweetness that cuts through the richness of the beef, while the garlic and onions deepen it into something complex. It’s the kind of dish where every bite surprises you—juicy, savory, with a hint of crispness from the apples.
- Leftovers That Don’t Suck: Between us, most beef-and-apple dishes turn into mush if you reheat them. Not this one. The flour coating keeps it tender but holds its shape, so the next day’s lunch is just as good as dinner. Pack it in containers, and you’ve got a meal that’s still exciting.
- Budget Meal for Busy Nights: Ground beef and apples are cheap staples, but this recipe makes them feel special. I’ve fed four people for under $12, and the leftovers stretch into lunches or even a quick pasta sauce. Honestly, it’s the kind of dish that makes grocery shopping less of a chore.
Step-by-step instructions for savory-sweet ground beef skillet
This dish delivers perfect balance—tender beef, caramelized apples, and rich sauce in one skillet.
🔥 Step 1: Sear the Ground Beef Until Browned
Heat the 1 tablespoon olive oil in a large skillet over medium-high heat until shimmering. Add the 1.25 lb ground beef (85% lean) and break it apart with a wooden spoon, letting it brown in 2-3 minute batches. You want the beef to develop a deep golden brown crust—this builds flavor.
Don't overcrowd the pan or the beef will steam instead of sear. Once browned, drain all but 1 tablespoon of the rendered fat from the skillet—this keeps the sauce rich without making it greasy.
👨🍳 Step 2: Cook the Onions and Apples Until Soft
Add the 1 whole yellow onion (diced) and 2 medium apples (Honeycrisp or Fuji, peeled and sliced) to the skillet. Cook for 5-6 minutes until the onions soften and the apples begin to release their juices. Stir occasionally to prevent sticking.
Here's the thing—you want the apples to soften but not fully caramelize yet. They'll finish cooking in the sauce later. The onions should turn translucent, and you'll notice the apples releasing their natural sweetness into the pan.
🍳 Step 3: Build the Flavor Base with Garlic and Spices
Add the 3 cloves garlic (minced), 2 tablespoons all-purpose flour, 2 tablespoons brown sugar, 1 teaspoon dried thyme, 1 teaspoon salt, and 0.5 teaspoon ground black pepper to the skillet. Stir well to coat everything evenly, letting the spices toast for 1-2 minutes until fragrant.
This is where the magic happens—the flour will thicken the sauce later, while the brown sugar and vinegar create that perfect sweet-savory balance. The garlic should sizzle just enough to release its aroma without burning.
🥘 Step 4: Deglaze and Simmer the Sauce
Pour in the 1 cup beef broth and 1 tablespoon apple cider vinegar, scraping up any browned bits from the bottom of the pan. Bring the mixture to a simmer, then reduce heat to medium-low and let it cook for 8-10 minutes until the sauce thickens slightly.
You'll know it's ready when the sauce coats the back of a spoon. If it thickens too quickly, add 1-2 tablespoons of water to loosen it. The apples should now be tender with caramelized edges—a sign the dish is coming together perfectly.
🍽️ Step 5: Finish and Garnish
Taste and adjust seasoning if needed. Remove from heat and stir in the 0.25 cup fresh parsley (chopped). Let the skillet sit for 2-3 minutes to allow the flavors to meld together.
Serve immediately while warm. The beef should be tender with juicy caramelized apples throughout. Garnish with extra parsley if desired, and enjoy with crusty bread or over mashed potatoes for a hearty meal.
Pro Tips For Making Ground Beef And Apple
- CRISP THE APPLES FIRST: Toss diced apples in 1 tablespoon flour and a pinch of salt before cooking—they’ll brown faster and hold their shape better. I used to skip this, and they’d turn mushy halfway through. Works like a charm.
- BREAK THE BEEF GRAIN: Use your fingers to separate the ground beef into small clumps before browning. It cooks more evenly and absorbs flavors better. Sounds silly, but it makes a real difference when you’re making a dish where texture matters.
- SWEAT THE ONION LOW: Cook the onion on medium-low heat until it’s translucent but not browned—this keeps it sweet and prevents bitterness. After burning two batches, I finally learned patience pays off here.
- SAVE THE JUICE: Deglaze the pan with a splash of apple juice or broth after browning the beef—it lifts all the fond (those tasty brown bits) off the bottom. I was skeptical until I tried it, and now I never skip it.
Common mistakes when making your ground beef and apple
Overcrowding the Pan
One of the biggest mistakes is adding all the ground beef to the skillet at once. This causes the meat to steam instead of sear, resulting in a pale, watery texture.
Instead, cook the beef in 2-3 minute batches, breaking it apart with a wooden spoon. This creates those beautiful caramelized edges that pack so much flavor. 🔥
Skipping the Fat Drain
After browning the beef, many people leave too much fat in the pan, which can make the final dish greasy. Drain all but 1 tablespoon of the rendered fat before adding onions and apples.
This keeps the sauce rich and balanced without overwhelming the dish. I’ve learned this the hard way—trust me, it makes a difference!
Undercooking the Apples
Apples need time to soften and release their juices, but they’re often undercooked in this recipe. They should cook for 5-6 minutes before adding the sauce, until they begin to break down slightly.
If you rush this step, you’ll end up with crunchy apple pieces that don’t blend well with the beef. Patience here is key!
Ignoring the Flour Toss
Many cooks skip coating the onions, apples, and spices with flour before adding the broth. This step is crucial for thickening the sauce and creating that perfect consistency.
Stir well for 1-2 minutes to let the flour toast slightly—this builds depth of flavor. Without it, your sauce will be thin and watery. 💡
Not Deglazing Properly
Deglazing the pan with beef broth and apple cider vinegar is where the magic happens, but it’s often done half-heartedly. Scrape up every browned bit from the bottom of the pan—those bits are packed with flavor!
Use a wooden spoon to loosen them, and let the liquid simmer for 8-10 minutes to develop a rich, caramelized sauce.
Over-Salting Early
Adding all the salt at the beginning can make the dish too salty before the flavors meld together. Instead, add half the salt when cooking the onions and apples, then adjust at the end.
Taste as you go—this dish should be seasoned perfectly, not overwhelmingly salty. A little goes a long way!
Nutrition facts
Frequently asked questions
Can I use ground turkey instead of beef?
Ground turkey works beautifully and will give you a leaner version. Use the same cooking method, but reduce the cooking time slightly since turkey browns faster. For best results, choose 93% lean turkey to mimic the beef's texture. The flavor will be slightly different but still delicious with the apples.
What if I don't have Honeycrisp or Fuji apples?
No problem! Gala or Braeburn apples work well—they hold up nicely during cooking. Avoid tart varieties like Granny Smith, as they'll overpower the dish. If you only have Granny Smith, reduce the brown sugar to 1 tablespoon and add ½ teaspoon cinnamon to balance the tartness.
How can I make this into a one-pan meal?
This recipe is already a one-pan wonder! Just add 1 cup diced potatoes or 1 cup cooked rice to the skillet with the onions and apples. Cook the potatoes for 10-12 minutes until tender, then proceed with the rest of the recipe. The potatoes will soak up the delicious sauce, making it a complete meal.
Can I make this ahead of time?
Yes! This dish actually tastes better the next day. Store leftovers in an airtight container in the fridge for up to 4 days. Reheat in a skillet over medium-low heat with a splash of water or broth to restore moisture. For freezing, portion into containers and freeze for up to 3 months—thaw overnight in the fridge.
Why does my sauce turn out too thin?
This usually happens if you skipped the flour toss or didn't simmer long enough. The flour is key for thickening—